Background
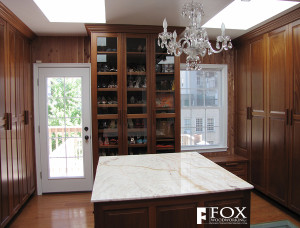
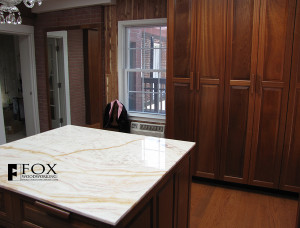
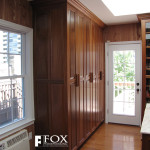
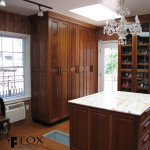
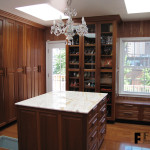
We built this Center City closet for a long-time client who said, "What my wife wants, she gets!" This closet is bigger than most Philadelphia kitchens. The cabinets are fully twenty-four inches deep and just under eight feet tall. The room itself is roughly sixteen feet by sixteen feet. It is perched on the top floor of this 150 year old, two million dollar, five thousand square feet home. The back door leads out on to the deck which overlooks another deck below and provides a great view of the skyline just beyond Rittenhouse Square. While there was a small elevator to take us and the tools up and down, anything over seventy-eight inches (basically all the cabinet sides and doors) had to be carried up the over one hundred stairs and four or six floors depending on how you count the staggered floors. We have built numerous projects for this client so after talking to numerous closet companies, he called us because he wanted something special for this room - not the usual prefabricated closet cabinetry.
Design Phase
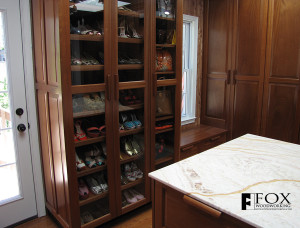
At our initial meeting, the client complained about the designs he had seen so far: too small; looked to much like a closet; built of melamine, etc. Since he wanted a special space, he wanted solid wood. After discussing various options, we decided to use sapele which has a nice warm color. After talking to him and his wife and what they wanted to store in the space and how they planned to use it, we began to form a basic design. Since people may be walking through this space to reach the deck beyond, we decided that 24" deep cabinets with doors would be best so that it felt more like a room as you passed through it. They also wanted a mix of hanging, shelf, and drawer space. While the hanging and shelf space would be easily accommodated by the cabinets along the wall, there was enough floor space (between the two glass floor plates that let you look down the stair well) for a set of island cabinets. In addition, by shortening a door near the window on the back wall, we were able to squeeze in a window seat with four drawers below it. The clients opted to stick with the standard closet rods and shelves for the most part rather than pull-out/down rods but they did want pull-out necklace/belt/scarf racks, jewelry trays, and laundry baskets. Just before finalizing the plans, we suggested that they add some glass doors to provide some display space for finer items and to break up the wall of sapele doors.
Engineering Phase
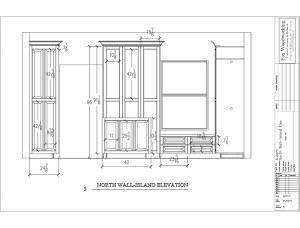
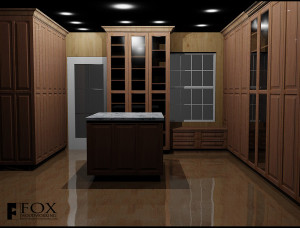
We designed the center city closet (and all our other projects) using Microvellum Toolbox 7 software. With this advanced design software, we are able to layout the project exactly as it will be built. This allows us to see any potential problem areas and to figure out any complicated areas. In this job, the most complex part was around the window seat. We needed to make sure that the shortened door would clear not only the window seat but any future cushion that may be placed upon it (although it would be a tragedy to hide the beautiful quarter-sawn sapele seat).
We also needed to make sure that the paneled end of the opposing cabinet matched the shortened door. Not only that, but by shortening the door, we found that we needed to add a divider to the cabinet so that the door had something to close against. With Microvellum's Toolbox, all of this was quickly taken care of and in such a way that when the client asked that the seat be a little higher, with just a few mouse clicks the change was made - rather then reengineering the whole cabinet. Once we were happy with the plan, we printed out the floor plans and elevations and some 3D renderings for the client's approval. Having received the approval, with a few more mouse clicks, we had our cut lists printed out and were ready for production.
Project Construction
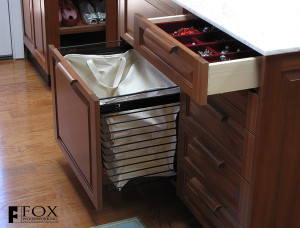
With the list of cut parts and print outs of the optimized way to cut the plywood panels from Microvellum's Toolbox software, the fabrication of these cabinets went quickly and smoothly. The cabinets are frameless cabinets and the doors and drawer fronts are full overlay. Although the client initially wanted all solid wood, we were able to convince him that veneer covered plywood was an acceptable alternative for the cabinets while assuring him that the doors and drawer fronts would be solid wood - and beautiful. Since the walls were covered with cedar planking, the cabinets have no backs. To prevent racking, they are secured to the toe kick bases and to wood blocking above the cabinets (concealed by the sapele crown molding). The doors and drawer fronts are, indeed, made of solid sapele. To keep with the feel of the old house, we used raised panels and ovolo coping and sticking on the stiles and rails. We also grain-matched adjacent stiles and rails to present a nice, flow from piece to piece so that it looks like a unified project rather than individual components. Similarly, we color-matched (and grain-matched as best as possible) the raised panels - many of which needed to be glued together to create the wide panels. The doors are hinged with concealed, soft-closing Salice Silentia hinges. The drawers are all solid wood made with dovetails and 1/2" thick plywood bottoms. They run on Blum undermount drawer slides with a soft-close feature. The pull-out laundry baskets with cloth liners are from Häfele.
While the baskets were not designed to have drawer fronts attached, we were able to create a system that allowed us to attach our drawer fronts. In addition, we installed a necklace pull-out and a tie/belt pull-out. We also provided two jewelry trays that fit into two of the island drawers. As a final touch, we made the elongated door and drawer pulls out of sapele as well.
Final Twist
After carrying most of this Center City closet up all those stairs, the installation was rather routine. Of course, every job seems to have a surprise. This one had a few. First, when we arrived on the site, the contractors had nailed up some pine soffits and chases to hide some exposed plumbing. While it was to be painted white, we we able to convince the client that replacing that work with sapele soffits and chases would really tie the whole room together (especially since it was the one wall with no cabinetry). Second, after they had had a mirror installed on the only other open space of wall, they decided that it needed a frame - a sapele frame. We were able to fabricate a frame with a recess in the back so that it fit over the glued on mirror.
Finally, there was a two part surprise that came from way out of left field. First, we were asked if the island could be placed on wheels so that they could move it around if they wanted to use the space for exercising. We took care of that with no problem. We reinforced the toe kick base and attached some wheels. Voila, a rolling island. Then, just as we were finishing installation, the client pops in with a new request: Can we put lights under the (yet to be delivered) marble island top? Of course, this is now a rolling island so getting power to the lights would be no simple task. Always looking to exceed the client's expectations, we found a solution. We were able to place a rechargeable 12v battery behind the large pull-out laundry basket to power the LED strip lights that we set into routed grooves in the cabinet tops (we, eventually, added a 3/4" frame to allow the light to spread out better under the top). The battery can be recharged by connecting a charger to the lead that extends through the bottom of the cabinet in the toe kick space.


